สิ่งที่ต้องเตรียม - บัญชีผู้ใช้จากระบบ email.wu.ac.th (อีเมลองค์กรปัจจุบัน) - โปรแกรม Outlook (classic) (แนะนำใช้ Outlook 2016 ขึ้นไป)
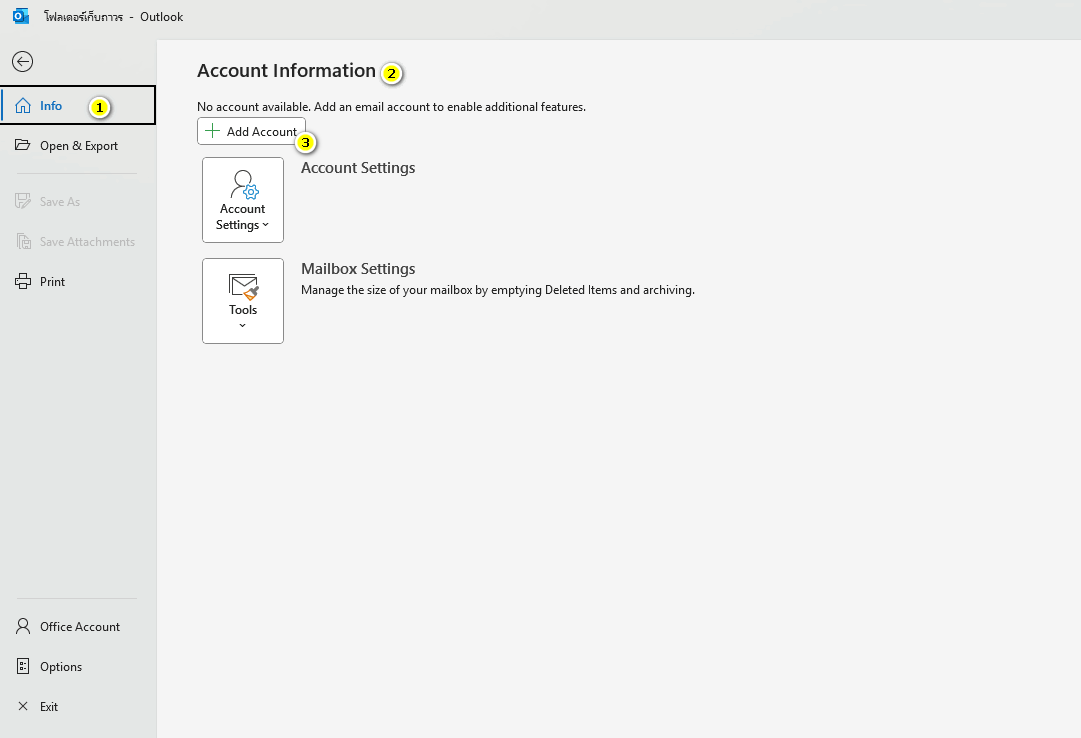
การใช้งานโปรแกรม Outlook สามารถทำได้หลากหลายวิธี ทั้งนี้เพื่อความสะดวกในการใช้งานทั่วไป คู่มือนี้จะแนะนำ 2 วิธีหลักที่ผู้ใช้งานสามารถเลือกใช้ได้ตามความเหมาะสม ดังนี้ - - - - **วิธีที่ 1 สำหรับโปรแกรม Outlook (classic)** - **วิธีที่ 2 การใช้งานสำหรับผู้ที่มีบัญชีอีเมลอื่นอยู่แล้วในระบบ Outlook** --- ##### **วิธีที่ 1 ผ่านโปรแกรม Outlook (classic)** เปิดโปรแกรม Outlook (classic) [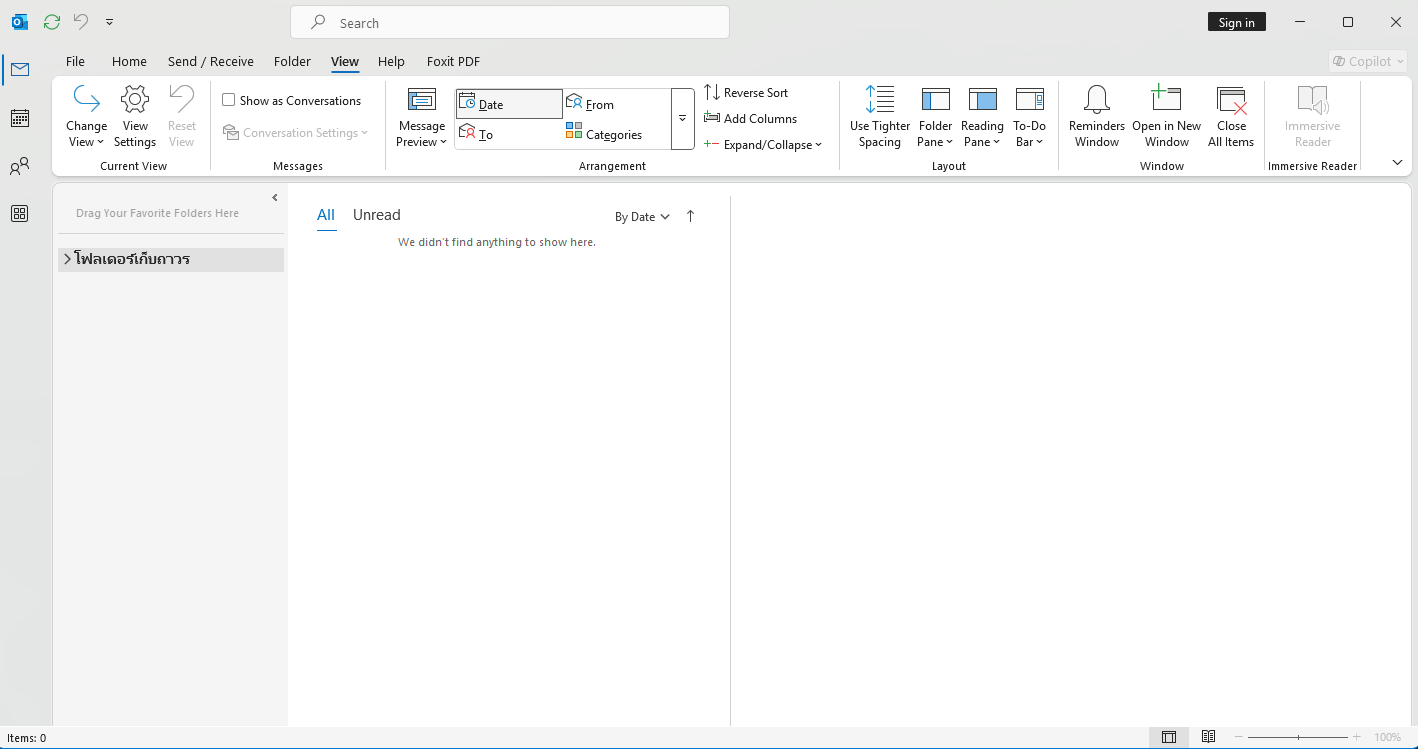](https://bookstack.wu.ac.th/uploads/images/gallery/2025-07/image.png) - ไปที่ File > Info >Account Settings > Account Information > เลือก Add Account\*\*\* หากไม่มีเมนู File ให้สังเกตมุมขวาบน เลือกแถบปิด New Outlook [](https://bookstack.wu.ac.th/uploads/images/gallery/2025-07/bJ7image.png)
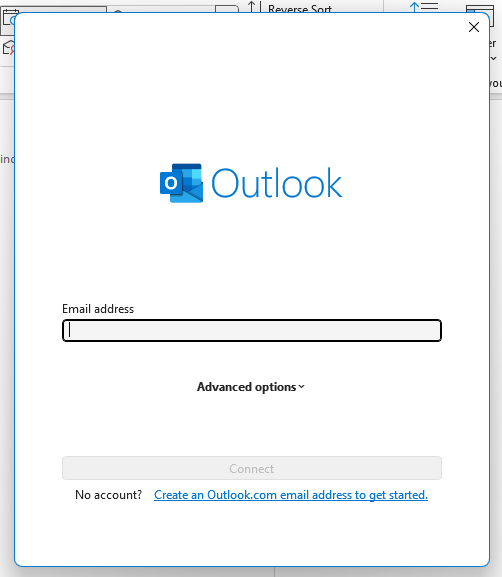
[](https://bookstack.wu.ac.th/uploads/images/gallery/2025-07/5Xsf43image.png) - ใส่ Email, Password ของบัญชีปัจจุบันของมหาลัยวิทยาลัย แล้วกด Connect\*\*\* ถ้ามีหน้าต่างแสดงลักษณะนี้ ให้เลือกเป็น Exchange 2013 or earlier [](https://bookstack.wu.ac.th/uploads/images/gallery/2025-07/PTpimage.png)
[](https://bookstack.wu.ac.th/uploads/images/gallery/2025-07/VSxkz2image.png)หากเชื่อมต่อสำเร็จ จะเห็นอีเมลโหลดเข้ามาใน Microsoft Outlook
--- ##### **วิธีที่ 2 การใช้งานสำหรับผู้ที่มีบัญชีอีเมลอื่นอยู่แล้วในระบบ Outlook** - ไปที่เมนู Help -> เลือก Go to classic Outlook [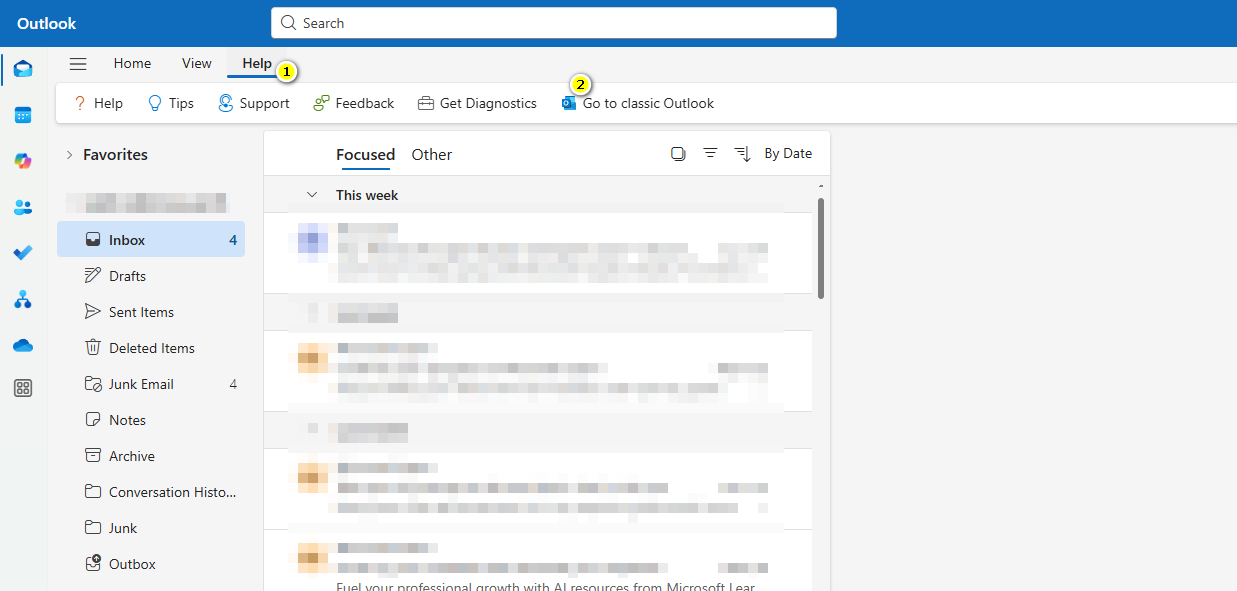](https://bookstack.wu.ac.th/uploads/images/gallery/2025-08/F6Iimage.png) โปรแกรมจะนำไปยัง **Outlook (classic)** โดยสังเกตที่เมนูด้านบนลักษณะเดียวกับในรูปด้านล่าง [](https://bookstack.wu.ac.th/uploads/images/gallery/2025-08/LJ5image.png) - ไปที่ File > Info > Account Settings > เลือก Manage Profiles 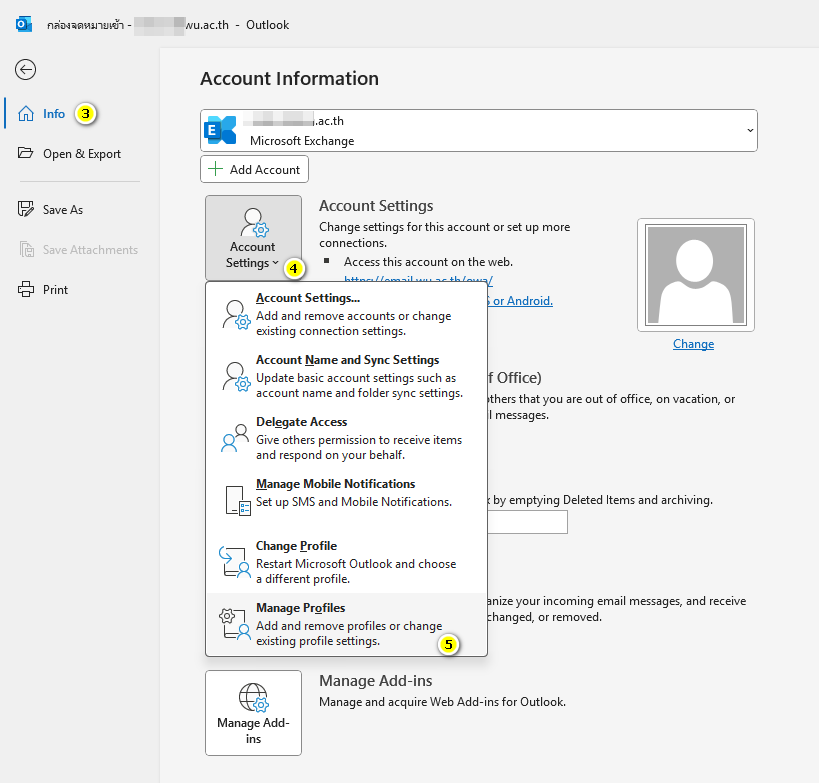 - จะปรากฏหน้าต่างดังรูป ให้เลือก Email Accoounts... 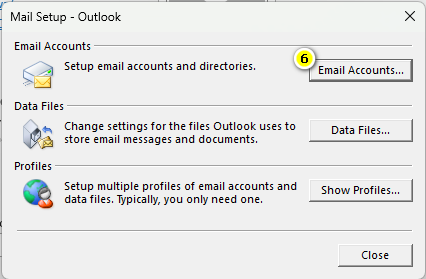 - ไปที่ Email Tab > เลือก New... 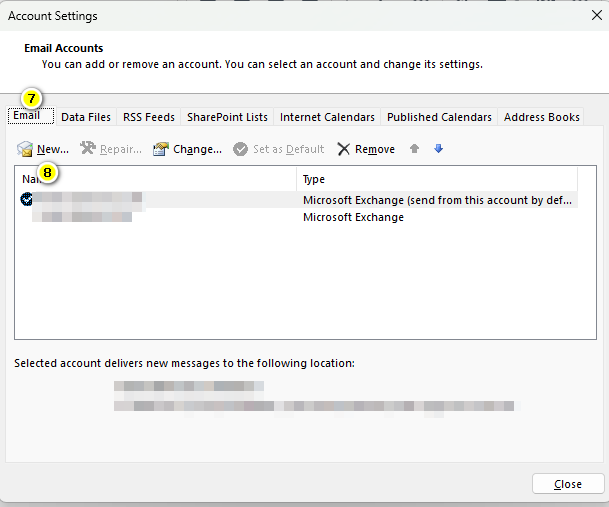 - กรอกข้อมูลตามฟอร์มให้เรียบร้อย เสร็จแล้วกด Next 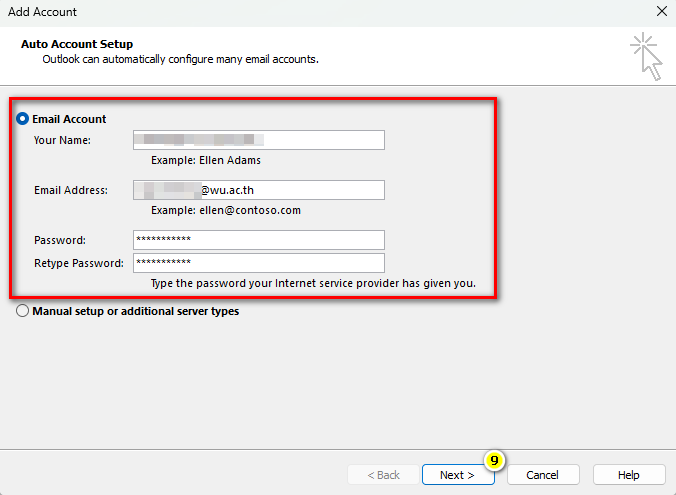 - รอกระบวนการยืนยันตัวตนให้เสร็จเรียบร้อย 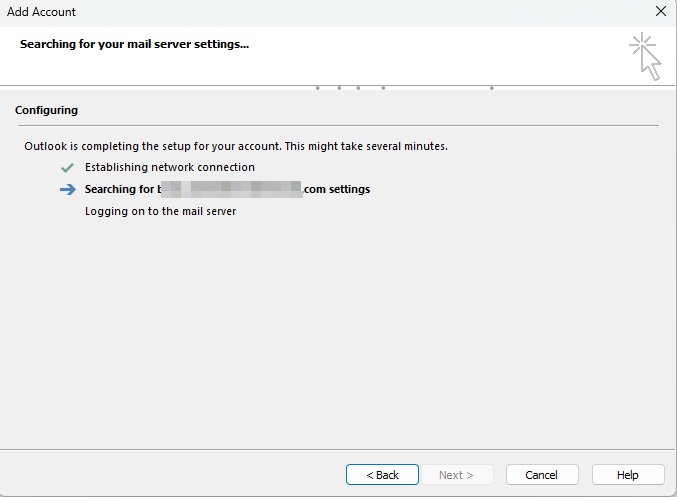 - หากสำเร็จจะขึ้นรายการเมลที่เพิ่มก่อนหน้านี้ดังรูป 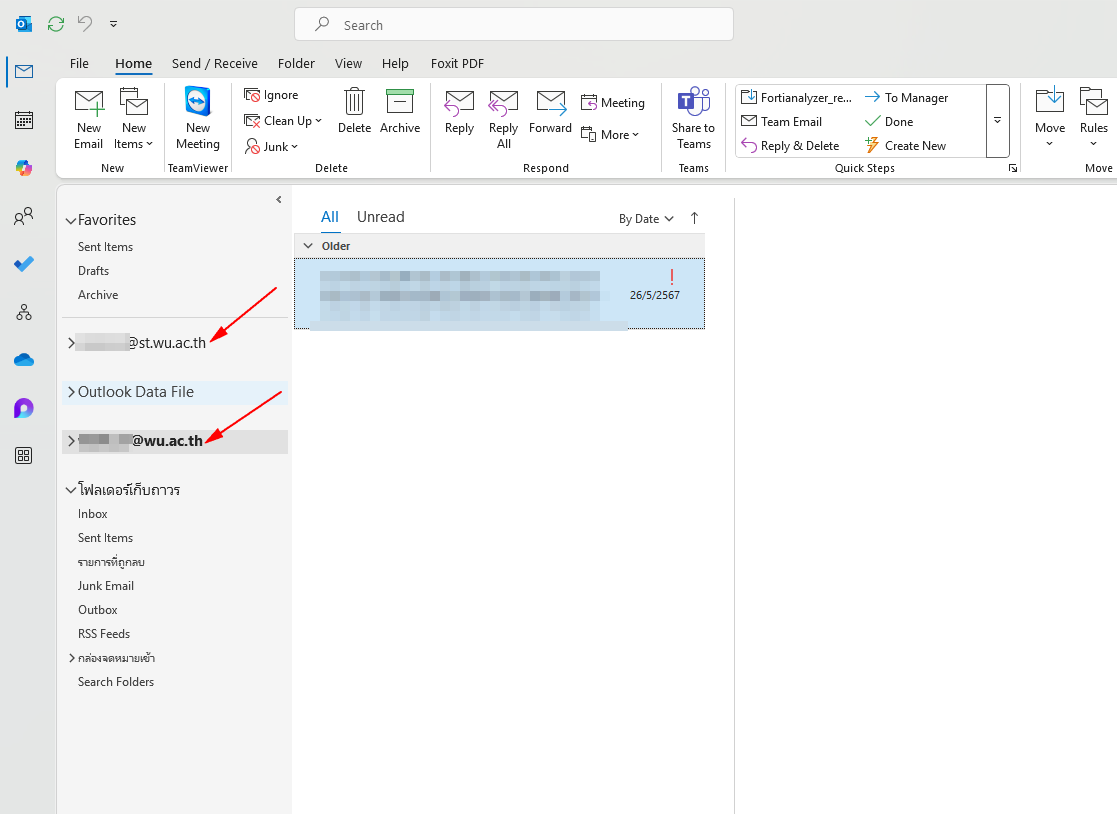 # วิธี Export อีเมล(@wu.ac.th) เป็น PST File หลังจากผู้ใช้งานทำการเชื่อมต่ออีเมลผ่านโปรแกรม Outlook เรียบร้อยแล้ว สามารถดำเนินการ Export หรือ Backup อีเมลออกจากระบบเดิมได้ เพื่อเตรียมข้อมูลสำหรับนำไปใช้งานในระบบใหม่ ***Microsoft 365 (News)*** ต่อไปเว็บไซต์ email.wu.ac.th เองไม่มีฟังก์ชัน export โดยตรง ซึ่งต้องใช้ Microsoft Outlook เชื่อมต่อบัญชี แล้ว export ข้อมูลจาก Outlook
ศึกษาการ Export เพิ่มเติมได้จาก Link: [https://www.youtube.com/watch?v=kfCX\_suwTAQ ](https://www.youtube.com/watch?v=kfCX_suwTAQ)[](https://bookstack.wu.ac.th/uploads/images/gallery/2025-07/export-e-mail.png)
# วิธี Import ไฟล์ .pst ไปยังบัญชีของ Office365 หลังจากที่ผู้ใช้งานได้รับไฟล์ .pst เรียบร้อยแล้ว สามารถนำเข้าไปยังบัญชีอีเมลในระบบใหม่ (Microsoft 365) ได้ 2 วิธี ดังนี้ - - - - **วิธีที่ 1 Import ไฟล์ .pst เข้าสู่บัญชีอีเมลในระบบ Microsoft 365 โดยตรง** - **วิธีที่ 2 เปิดไฟล์ .pst เพื่อใช้ในการอ้างอิงประวัติ (Open Outlook Data File)** --- ##### ##### **วิธีที่ 1 Import ไฟล์ .pst เข้าสู่บัญชีอีเมลในระบบ Microsoft 365 โดยตรง**จำเป็นต้อง Login บัญชีของ Office365 หลังมีการเปลี่ยนระบบเรียบร้อยแล้ว จึงสามารถ Import อีเมลจากระบบเดิมเข้าไปยังระบบใหม่ได้ โดยเริ่มได้งานตั้งแต่ วันที่ 4 สิงหาคม 2568 เป็นต้นไป
ศึกษา Import เพิ่มเติมได้จาก Link: [https://www.youtube.com/watch?v=V-V8wBtctlQ ](https://www.youtube.com/watch?v=V-V8wBtctlQ)[](https://bookstack.wu.ac.th/uploads/images/gallery/2025-07/import-e-mail.png)
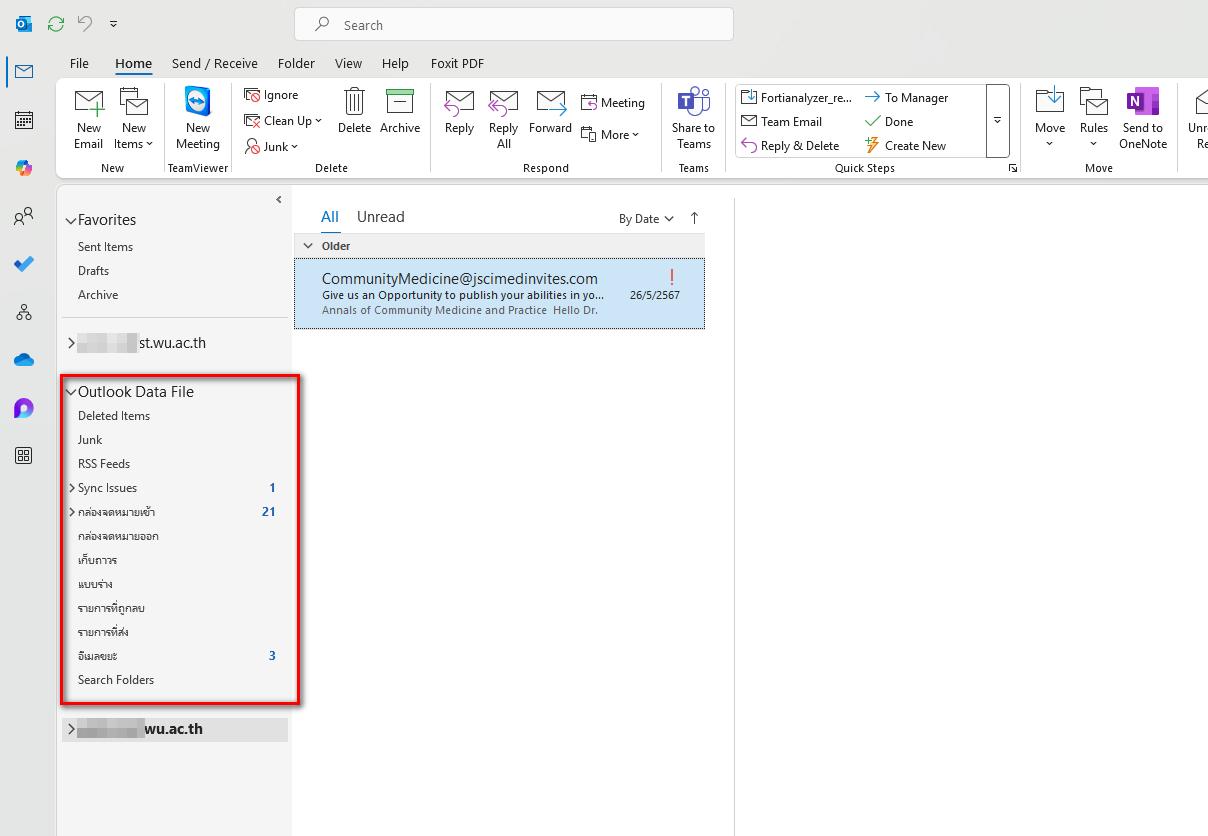
--- ##### **วิธีที่ 2 เปิดไฟล์ .pst เพื่อใช้ในการอ้างอิงประวัติ (Open Outlook Data File)** ##### - ไปที่ File > Open & Export > เลือก Open Outlook Data File [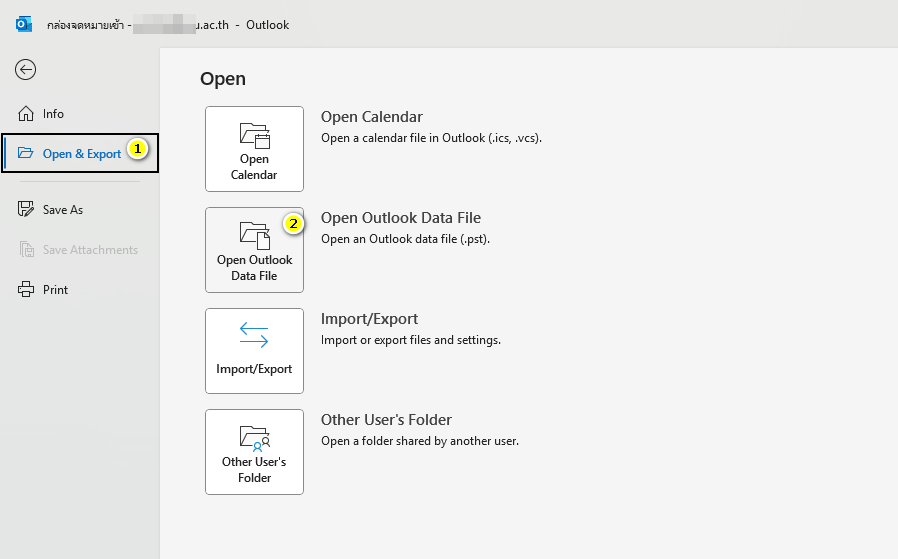](https://bookstack.wu.ac.th/uploads/images/gallery/2025-08/A0Dimage.png) - มีหน้าต่างแสดงให้เลือกไฟล์ .pst สำหรับ Import เข้าระบบ และใส่รหัสผ่านที่ตั้งไว้ตอน Export File .pst 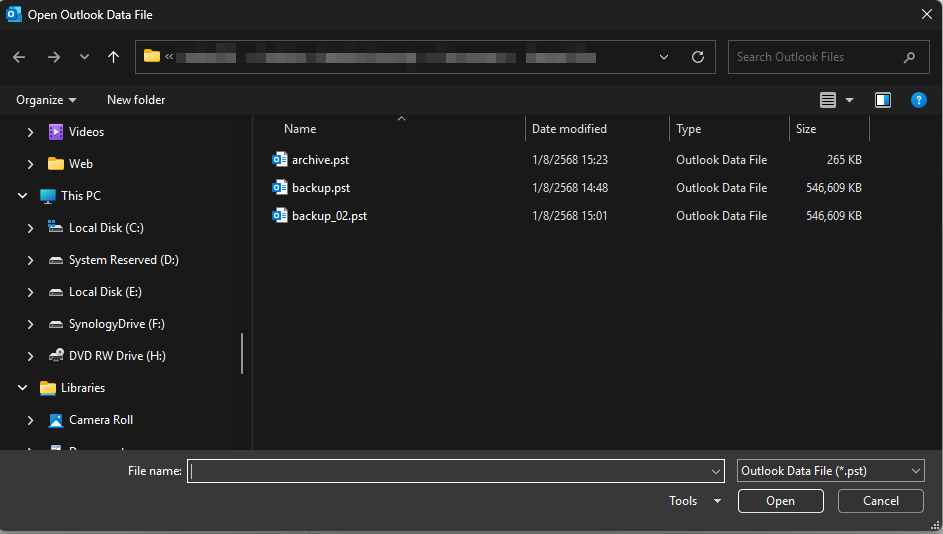 - หากสำเร็จแล้วจะมีรายการอีเมลที่แสดงในเมนู Outlook Data File ดังรูป