# Network configuration
##### **Start basic configuration**
**ข้อมูลเบื้องต้นเกี่ยวกับ Switch CISCO**
| Parameter | Default value |
| Username | cisco |
| Password | cisco |
| Lan IP | 192.168.1.254 |
- Step 1 เชื่อมต่อสาย Lan เข้ากับ switch พอร์ตใดพอร์ตหนึ่ง
- Step 2 Setup IP address บนเครื่องคอมพิวเตอร์ให้อยู่ในระหว่าง 192.168.1.2 ถึง 1192.168.1.253
- Step 3 ทดสอบ ping ไปยังอุปกรณ์ Switch IP : 192.168.1.254
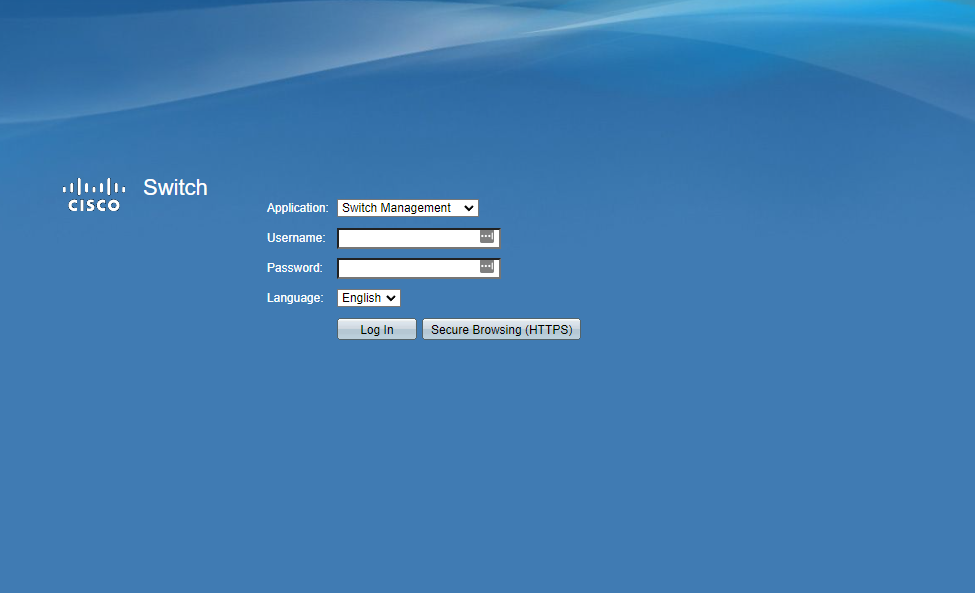
- Step 4 เปิดใช้งาน Web browser บนเครื่อง และพิมพ์เข้าเว็บไซต์ http://192.168.1.254 จะขึ้นหน้าต่างดังนี้
[](https://bookstack.wu.ac.th/uploads/images/gallery/2022-12/image-1671681545417.png)
- Step 5 ใส่ Default Username คือ cisco และ Defualt Password คือ cisco หลังจากนั้นคลิก Login
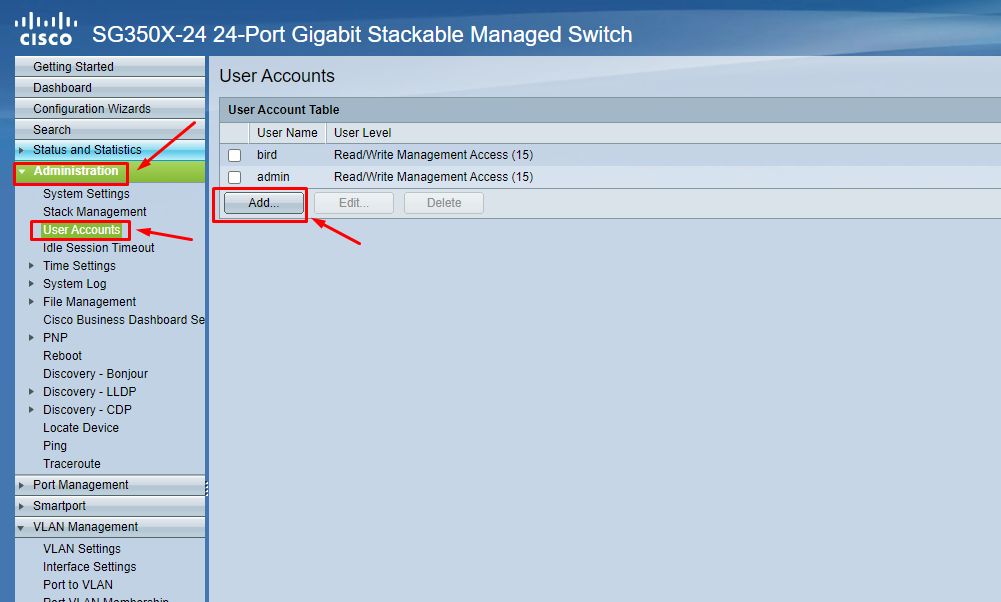
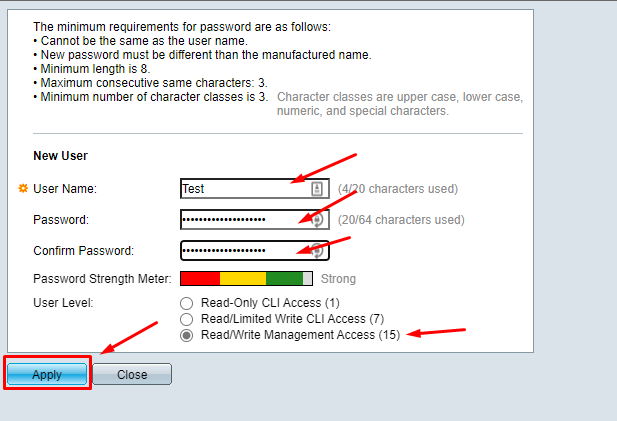
- Step 6 สร้าง User สำหรับ Access อุปกรณ์ และเลือก User Level
โดยเข้าไปที่ Administration -> เลือก User Accounts -> Add
[](https://bookstack.wu.ac.th/uploads/images/gallery/2022-12/image-1671690238354.png)
- Step 7 เมื่อกดเลือก Add จะมีหน้าต่างสำหรับสร้าง User จากนั้นกรอกข้อมูลให้ครบถ้วน และกด Apply
[](https://bookstack.wu.ac.th/uploads/images/gallery/2022-12/image-1671690575299.png)
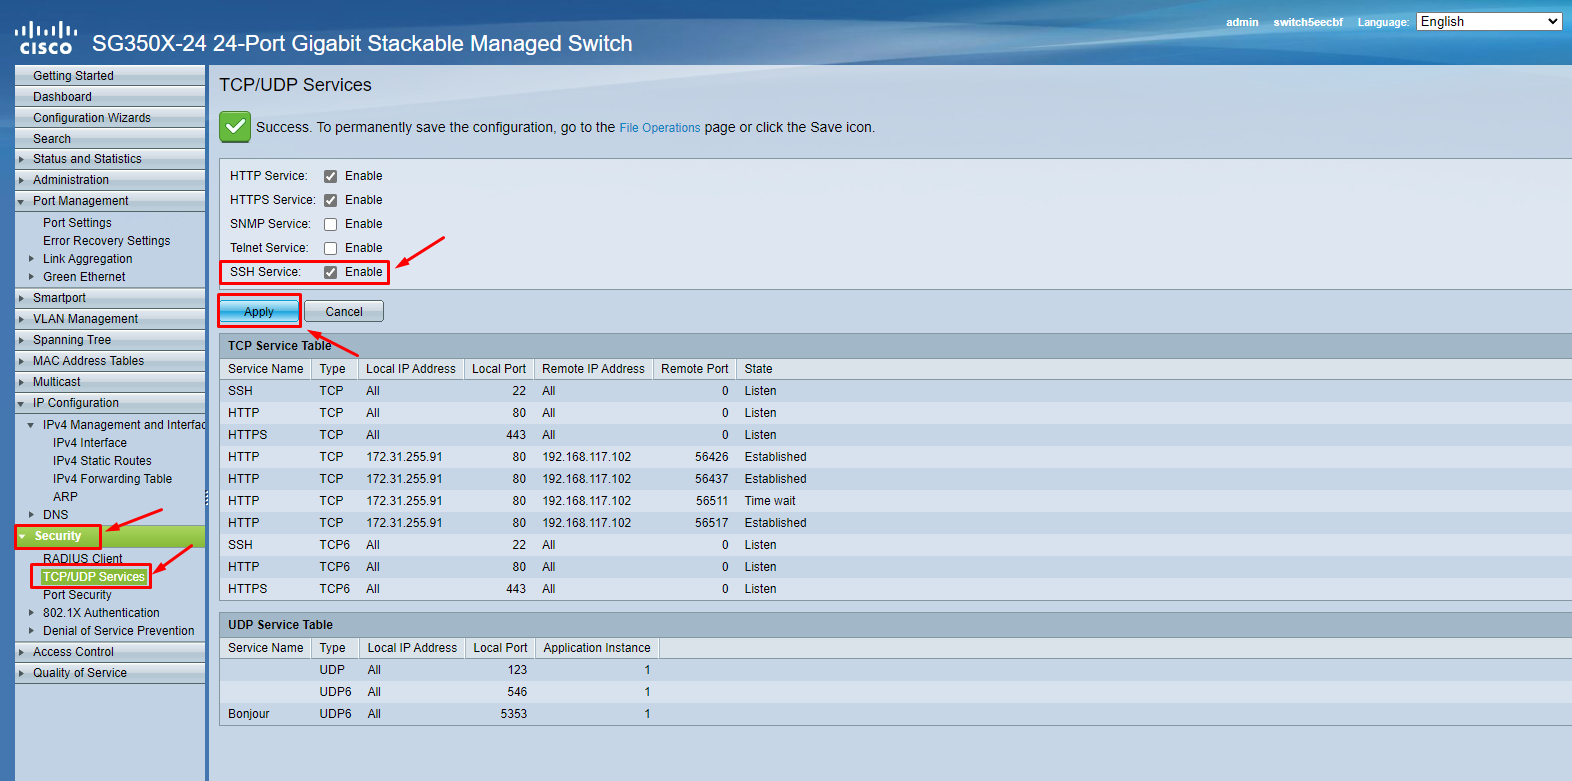
- Step 8 จากนั้นให้ทำการ Enable เปิด Service SSH Service
โดยไปที่ Security -> เลืือก TCP/UDP Services -> ติ๊กที่ Enable หัวข้อ SSH Service และ กด Apply
[](https://bookstack.wu.ac.th/uploads/images/gallery/2022-12/image-1671690959316.png)
---
##### **Basic network configuration**
- Step 1 เชื่อมต่อ COM port เข้ากับ PC และ command ผ่านสาย console ของอุปกรณ์ Switch
- Step 2 Run โปรแกรม terminal สำหรับการเชื่อมต่อการสื่อสาร
ตั้งค่า parameter
- Baud rate: 9600 bps
- Data bit: 8
- Stop bit: 1
- Parity: none
- Flow control: none
- Step 3 Config MGMT IP address
```Python
# configure terminal
(config)# hostname NAME
(config)# vlan 10
(config)# interface vlan 10
(config-if)# interface vlan 10
(config-if)# ip address 10.10.1.2 /24
(config-if)# name Lab-test mgmt
(config-if)# exit
(config)# ip default-gateway 10.10.1.1
(config)# interface GigabitEthernet 1/0/24
(config-if)# switchport mode trunk
(config-if)# switchport trunk allowed vlan 10
(config-if)# exit
```
- Step 4 Verify configuration
```Python
# show running-config
OR
(config)# do show running-config
```